
In this article (8 sections)
Most lifting jobs are priced from photos, and we only visit when the photos can't answer something. The price comes down to things a picture can show: how much concrete is low, how far it dropped, which way it tips and what shape it's in. This guide covers what the photo estimate form asks for, the three photos that go with it, how to measure the drop, and the extra shots that head off follow-up questions.
What the estimate form asks about sunken concrete
The form has four steps: what you need, details, photos and contact. For a lifting job, the details step asks three things:
- Which concrete. Driveway, garage apron, sidewalk or walkway, patio, pool deck, steps or stoop, porch, garage or shop floor, or another slab like an AC pad or shed floor. Pick every surface that needs work.
- How many slab sections are low. A section is the area between two joints.
- About how far the lowest spot dropped. The choices are ranges: under 1 inch, 1 to 2, 2 to 3, 3 to 4, or more than 4 inches. There's also a "Not sure" choice, and a tape-measure photo answers it for you.
Then comes the photo step. Three shots price most jobs, and the form takes up to 8. No photos handy? You can skip that step and text them to (920) 655-2193 later.
The three photos
- 1The wide shotAll of the concrete in question, plus the house or garage it meets. Stand back far enough to get it in one frame, and hold the phone sideways. This shows us how many sections are involved, how big they are and how we'd get to them.
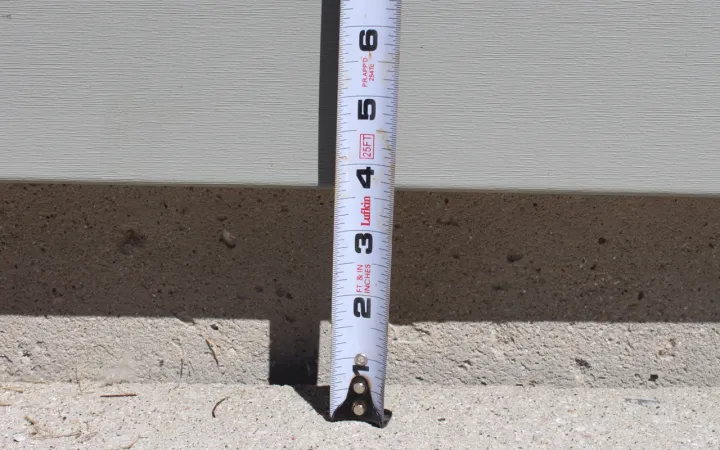
- 2The tape measureStand a tape measure upright at the lowest edge of the sunken slab, next to the slab that didn't move, and get close enough that the numbers can be read. This is the photo that shows the drop.
- 3Down the lineCrouch at one end and shoot along the length of the slab. This shows tilt, and whether water runs toward the house.
More than one area? Send a wide shot and a tape-measure photo for each one. If the driveway and the front walk both dropped, that's two sets, and the form has room for 8 photos.
How to measure the drop
- At a joint, measure from the top of the higher slab straight down to the top of the lower one.
- For a slab that tipped, lay a straight board or level on the good slab, extend it over the low one, and measure the gap at the far end.
- Measure at the lowest point. That's the number that sets the price.
You don't have to be exact. The form's choices are an inch wide, and we read the tape in your photo. A phone and a tape measure cover most jobs; the board or level only matters when a slab has tipped instead of dropping at a joint.
Measure after the frost is out
Frost lifts slabs unevenly from early winter into spring, so a March measurement can mislead you. A slab that's riding high on frozen soil may settle back by May, and one that looks fine may drop once the ground thaws and drains. Take photos whenever you notice the problem, then measure again once the frost is out. We don't lift on frozen ground anyway, so nothing is lost by waiting for the real number.


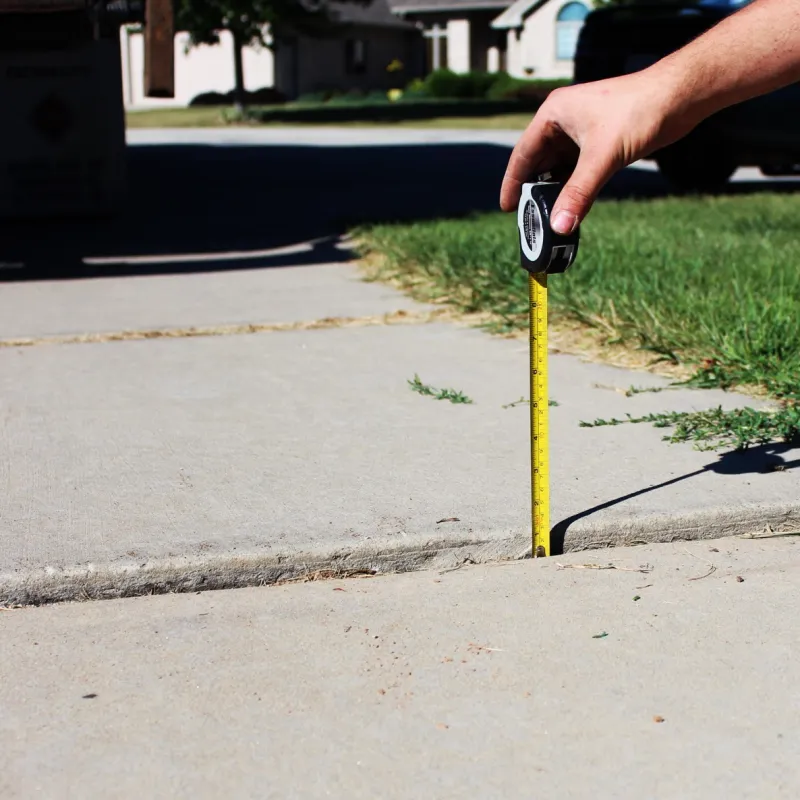
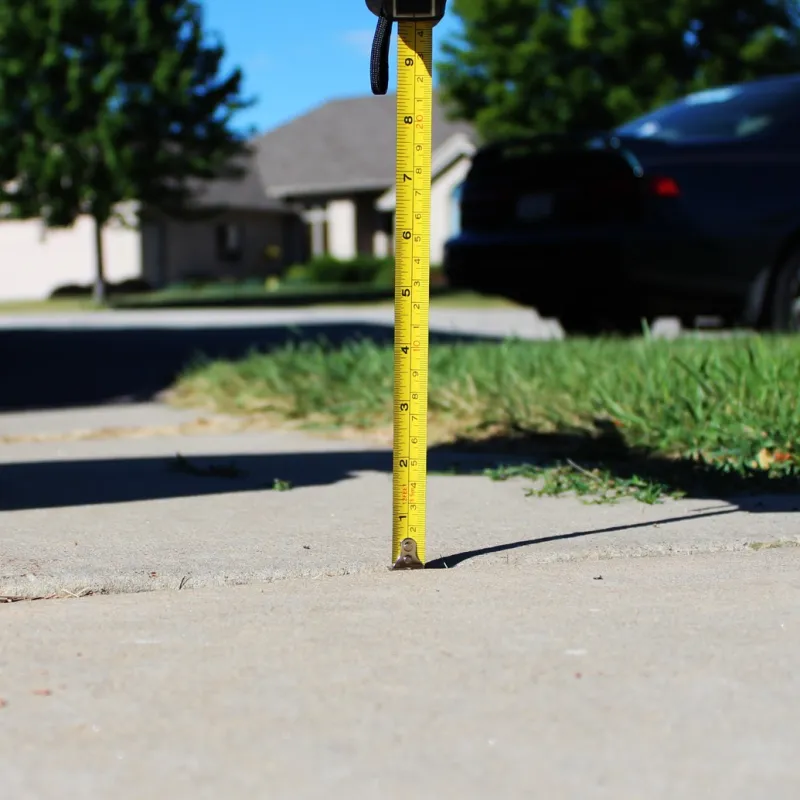
Example lifts. Photos from our own local jobs get added as we finish them.
Counting sections
Count each section that sits low or tipped, not every section in the driveway. A section is the area between two joints, so a front walk is a row of small sections and a driveway is a few large ones. If you know roughly how long the walk or driveway is, add it in the form's "Anything else?" box; if you don't, the wide shot lets us size it.
Your count and your measurement are what place a job on the price sheet. Lifting has a $300 minimum, and larger jobs run about $4–$10 per square foot. These are the published ranges:
| Job | Typical price |
|---|---|
| Single sidewalk panel, AC pad or small stoop | $300–$600 |
| Front walk, 3–5 panels (50–125 sq ft) | $300–$1,250 |
| Garage apron, approach or one driveway section (about 100 sq ft) | $400–$1,000 |
| Patio, 1–2 slabs (about 150 sq ft) | $600–$1,500 |
| 2–3 driveway sections (200–300 sq ft) | $800–$3,000 |
| Several areas in one visit (300–400 sq ft) | $1,200–$4,000 |
What your measurement tells us
| Drop at the joint | What it usually means |
|---|---|
| Under ¼ inch | Usually fine to seal and watch |
| ¼–½ inch | A trip hazard; on a business's accessible route the ADA calls for a bevel |
| Over ½ inch | Lift it; the ADA treats this as a ramp on accessible routes |
| 1–4 inches | The range most residential lifts fall in |


Example lifts. Photos from our own local jobs get added as we finish them.
Extra photos that help
None of these are required. Each one answers a question we'd otherwise text you about:
- Close-ups of any cracks. A slab cracked into a few large pieces can be lifted piece by piece. One broken into many small pieces is better replaced, and a photo tells us which you have.
- Where the downspouts discharge. A downspout emptying onto or beside a slab is the most common single cause of a sunken corner, and we'll point it out from your photos.
- The side of a stoop, so we can tell whether it's solid or hollow.
- Anything heavy sitting on the slab.
- The pattern, on stamped or decorative concrete. A close-up of the pattern and texture lets us plan where the holes go.
Photos for other services
The form asks for three shots for every service, and they change with the job. If you're adding a coating, cleaning, sealing or caulking to the same request, these are the ones it asks for:
| Service | Photo 1 | Photo 2 | Photo 3 |
|---|---|---|---|
| Floor coating | Whole floor: From the doorway, with the walls and the door in the shot | Up close: Cracks, pits, salt damage or peeling, with a coin or tape for scale | Edges and steps: Where the floor meets the walls, steps, a drain or the apron |
| Concrete cleaning | Wide shot: The whole area, so we can size it | Stains up close: Oil, rust, tire marks or green growth | What's around it: Siding, plants and drains next to the concrete |
| Concrete sealing | Wide shot: The whole surface, so we can size it | Up close: The surface, plus any flaking, scaling or old sealer | Water test: Splash a little water on it: does it soak in or bead up? |
| Joint and crack caulking | Wide shot: The slabs and joints that need it | Joint up close: One joint or crack, with a tape across it to show the width | Down the joint: Shoot along it so we can see how far it runs |
What happens after you send them
- 1We look over your photos and answersIf the photos leave a question, we'll ask before we quote.
- 2You get a firm price by text or emailWithin 24 hours, with what's included spelled out.
- 3Approve it and pick a dateA site visit only happens if the photos can't answer something.